
fun with food

green lime sherbet
2 quarts pineapple juice
2 liters ginger ale
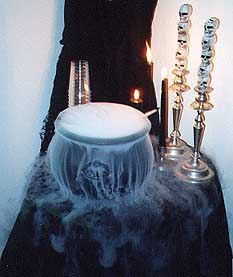
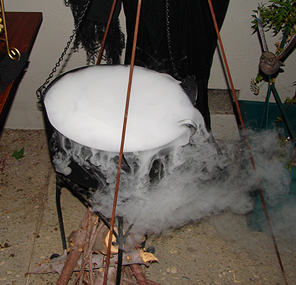
Place a few scoops of lime sherbet into the cauldron or punch bowl. Pour in the pineapple juice and ginger ale in equal parts until the container is full. For safe dry ice, fill a large spice ball with small chunks of dry ice and place into the brew. The carbonation in the ginger ale disintegrates the sherbet into scummy foam, the pineapple juice makes the brew opaque to hide the spice ball, and the foamy bubbles fill with dry ice fog that eventually pop, leaving wisps of smoke rising from the surface of your Bubbling Witches' Brew!
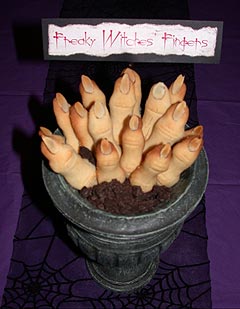

Freaky Witches' Fingers
(featured inside the book Eerie Elegance)
Yields 5 dozen
1 cup butter, softened
1 cup powdered sugar (= icing sugar = confectioners sugar)
1 egg
1 tsp almond extract
1 tsp vanilla
2 2/3 cups flour
1 tsp salt
3/4 cup almonds, whole, blanched or sliced
1 tube red decorator gel (optional, not pictured)
In bowl, beat together butter, sugar, egg, almond extract and vanilla. Beat in flour and salt. Cover and refrigerate at least 30 minutes. Working with one quarter of the dough at a time and keeping remainder refrigerated, roll heaping teaspoonful of dough into finger shape for each cookie. Squeeze twice along finger length to create knuckle shapes. Press almond firmly into one end for nail. After arranging on the lightly greased baking sheets, make slashes with a paring knife across in several places to form knuckles. Clusters of three slashes for each knuckle looks best.
Bake in 325 F (160 C) oven for 20-25 minutes or until pale golden. Let cool for 3 minutes. Lift up almond, squeeze red decorator gel onto nail bed and press almond back in place, so gel oozes out from underneath. You can also make slashes in the finger and fill them with "blood." If you are opting for less gore, you will still need spare icing to glue the almond nails to the cookies after baking, since otherwise they fall off too easily during storage and serving.
When cool enough to stay intact, remove fingers from baking sheets and let cool on racks before storing. Repeat with remaining dough. Baked cookies will keep in an airtight container for at least two weeks. Unbaked mixed dough can be kept refrigerated for at least a week. Arrange for serving attractively on a plate, reaching up out of an urn of chocolate cookie crumb dirt, crawling out of a basket, or your own creative idea.

Here are some FREE pumpkin carving templates to print out.
what you can do to your ride for Halloween


How to make fake scars and cuts. courtesy of chick advisor


- Fake Blood
- 'Fake Skin'- usually has a putty or wax consistency
Tip! We found both these items at the dollar store, however in a pinch you can try making your own fake skin-
- 2 Foundations, one lighter, one darker shade (can be liquid or cream)
- Loose Powder (pressed powder works as well, not as good though)
- Paint Brush
- Large Blush or Powder Brush
- Plastic Knife
- Staples or Fishing Wire

Step 1- Take some of the fake skin and roll into a ball or long cylinder shape, place onto the desired spot for your scar tissue.
Step 2- Smooth down the edges to adhere to the skin. You can also press down or raise the fake skin if you wish.

Step 3- Cover the entire fake scar in the lighter shade of foundation. Blend into scar and surrounding skin area.
Step 4- Over top of this, cover the scar in the darker shade of foundation to even out the skin tone and to make the wound really pop! We used a mousse foundation for this step- if you have a liquid or cream, it will work just as well!

Step 5- Set the scar with your loose powder. Cover the entire area with powder.
Step 6- 'Split open' the wound with the straight edge of a plastic knife. We chose to cut right down the middle. To make the scar appear more realistic, be sure to press down the edges and flick them slightly outwards to open up the cut.

Step 7- Taking some of the fake blood on your paint brush, paint the inside of the cut in red, letting it drip and bleed over the sides. If you want to add some dried or blood stains around your wound, this will add to the effect.
Step 9- For super gross stitches, we put in some metal staples across the gash. You could also place fishing wire knots around the edges or fishing wire strands.

Here is a fake skin Recipe
Materials Needed:
- 8 TBSP flour
- 5 TBSP warm water
- Regular or Halloween face makeup
Mix together the flour and water, this will result in a dough like mixture. Do not add the makeup into the mixture.
Use this mixture and with a bit of regular elmer's school glue it can be affixed to the face or body. Mold the dough or fake skin to desired effect and then let dry. Keep in mind that this will take quite a while. However after adding the makeup and the fake blood or other gruesome effects the simple dough comes to life.
And for fake blood. here ya go!

No comments:
Post a Comment